
|
The Basic Breakout Techniques of Hap Ki Do
This article will share some concepts which proponents of Hap Ki Do feel provide a worthwhile complement to the already formidable techniques of the sister art of Tae Kwon Do. These are the basic breakout techniques of Hap Ki Do. To some, fighting back involves strong blocks and resistance, while to others, a practical passive response, if one is available, is preferred. The basic breakout techniques of Hap Ki Do will, with practice, allow the martial artist to disengage himself or herself from the physical grasp of virtually any opponent, without having to rely on the "heavy artillery" for a first response. After all, there are many degrees of response to be considered before depending on a groin kick to solve a problem. The name Hap Ki Do parallels the Japanese Ai Ki Do, though the two systems adopt differing philosophies toward self defense. Despite the differences, the names are both derived from the Chinese characters meaning "together", "energy" and "path". In Hap Ki Do, they speak of a path or martial discipline, whose ultimate objective is to synthesize the talents of the student with the teachings of the system into an entity able to coordinate his or her physical, mental and spiritual energy at will. The trained practitioner can respond appropriately to any situation ranging from a crisis at the office, to physical emergency. Of course, the litmus test of any martial arts system, especially Hap Ki Do, is its ability to accomplish what it sets out to do. It is not the goal of Hap Ki Do for the student to become an acrobat or an acupuncturist; to lie unharmed on a bed of nails or to break pine boards. Many practitioners of the style can do these things, but ultimately, the student seeks to draw upon the diverse resources of the system and grow to a new plateau of physical, mental and spiritual capacity not otherwise possible through his or her own individual endeavors. The starting point for this journey is mastery of the breakout techniques. We sometimes hear of esoteric techniques passed from antiquity for the benefit of select martial artists who, in the execution seem almost to possess magical powers. Whether it's the iron palm, the immovable body, fighting blindfolded or the one inch punch, demonstrations of these techniques never fail to evoke expressions of wonderment from appreciative audiences. Inevitably, the techniques represent levels of strength, perception and power not readily available to the average person. When I first encountered the basic breakout techniques of Hap Ki Do, I experienced the same sense of wonderment as when I had earlier witnessed a boulder being smashed on the abdomen of a Kung Fu practitioner. He was lying on a bed of nails at the time. The Hap Ki Do demonstrator had made the statement that no one could hold his arm so tightly he could not instantly release himself from the grip. Needless to say, no one could. If done properly, these breakout techniques will work in every instance, regardless of differential in size, weight or strength. A most impressive demonstration is to witness a 95 pound female frustrating the efforts of a macho 200 pounder trying to grab and hold one of her arms.
Overview Before introducing the four breakout techniques, I must stress these techniques are to be executed softly. What doesn't show in the photos is there is no rigidity or forcefulness in the defender's movements. If you find yourself tensing your muscles or wanting to bully your way through the technique, stop and recompose yourself. The techniques will only work if executed softly. They will not work otherwise ! Likewise, it is important in all the techniques that undue emphasis not be placed on speed. Each of the techniques will work perfectly, even in slow motion. So don't rush ahead of yourself. Lastly, the final key to making each technique work is that the motions of the arms and legs happen at the same time. It is this concurrent motion which ensures the effectiveness of the technique during a crisis.
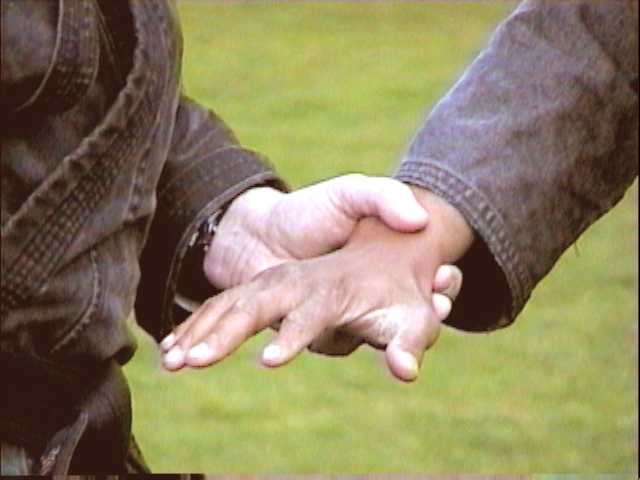
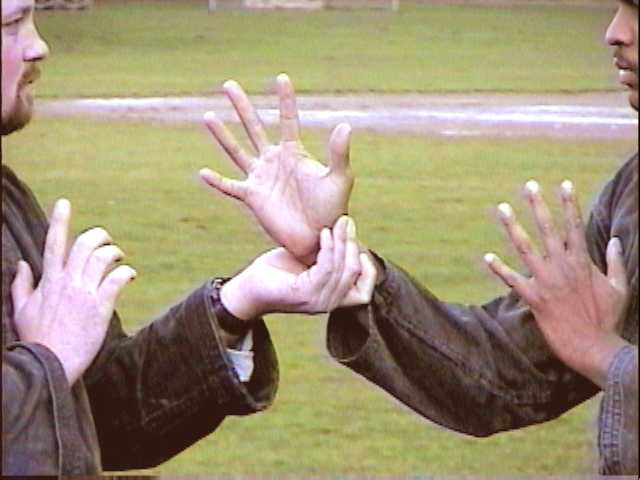
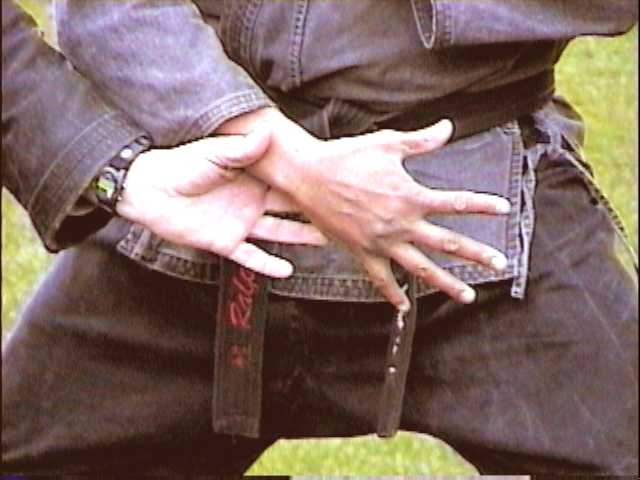
The Live Hand A concept which resurfaces throughout the explanation of the techniques is that of the Hap Ki Do "live hand". Explaining the "live hand" would require an article in its own right. However, for our purposes, it is adequate to describe it as the position your hand takes when you hold it out and attempt to stretch the fingers as far apart as they will go. Philosophically, the "live hand" relates to the flow of Ki (as in Hap Ki Do), and its use incorporates that energy into the technique. Practically speaking, when someone grabs you tightly at the wrist, performing a "live hand" will expand your wrist just enough to create a flaw or weakness in the attackers grab. This will be the doorway through which you will effect your escape.
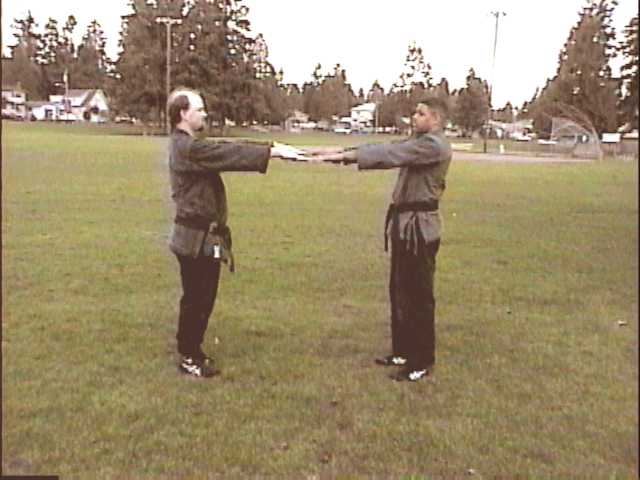
During the learning
phase, it is important to eliminate unnecessary
variables by maintaining proper distancing. Students
should position themselves approximately five feet apart
(or double arms length distance). A good way to assure
proper distancing is for the students to extend their
arms straight out frontward and stand so that their
fingertips touch. They can then bring their arms down
and get on with the practice.
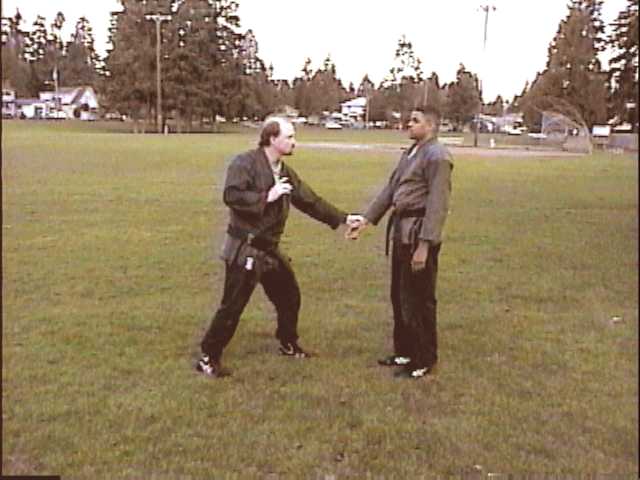
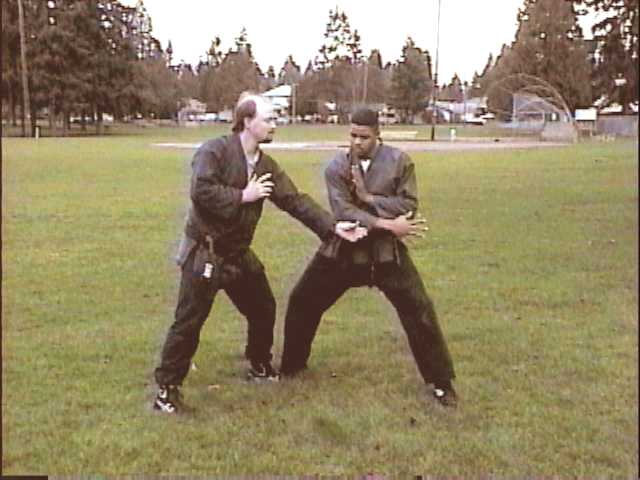
The Attack Again, for purposes of
learning, the attack will be the same throughout.
Attacker will step forward with his left leg and use his
left hand to grasp defender's right arm at the wrist.
The Techniques
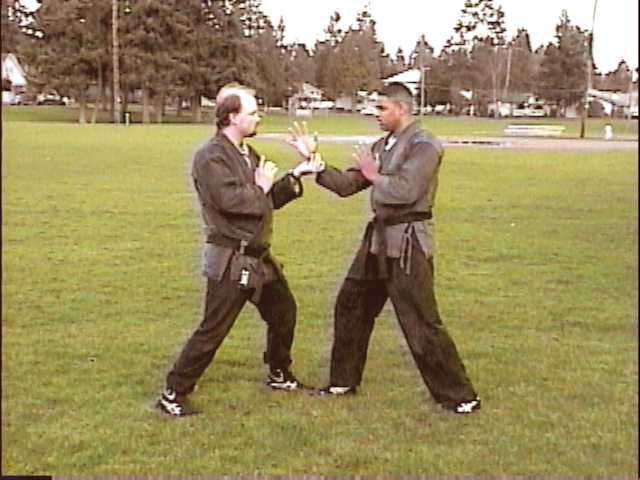
Photographs #3 & 4 Technique
#1 (Photographs #3 & 4): Defender
responds to the attack by stepping forward with his
right leg, towards attacker's right side.
Simultaneously, defender thrusts his right "live hand",
palm downward, in the same direction. The motion is
complete when opponent's grip has been completely
released. Photograph #4 shows the combined effects
of the defender's forward movement and the "live hand"
release, in breaking attacker's grip.
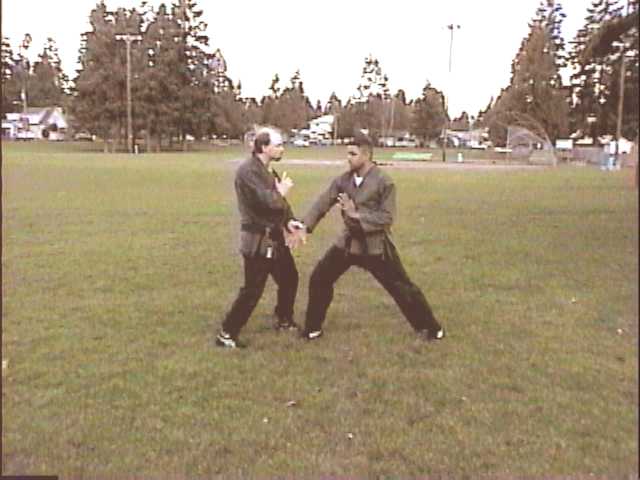
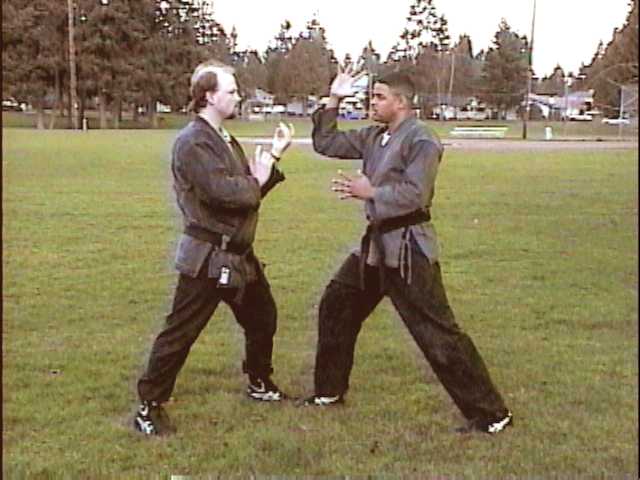
Technique #2
(Photographs #5, 6 & 7): Defender responds to
the attack by stepping straight forward and, with a
"live hand", thrusts his bent right arm upward and back.
Think of the motion as though your intention were to
execute a right upward elbow strike into opponent's
chin. As your arm is moving through its upward arc, be
sure that your "live hand" is positioned so that your
right palm is facing directly left, parallel to the
plane of movement.
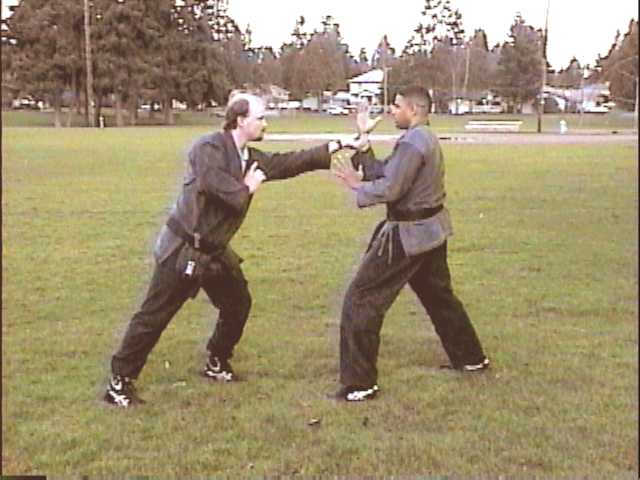
Photographs
#8 & 9
Technique #3
(Photographs #8 & 9) : This is essentially the
same technique as #2, except that the defender steps
backward with his right leg while thrusting the "live
hand" upward with the right hand. Though I prefer
stepping backward into a back stance, many practitioners
use a cat stance or even a casual stance. The importance
of technique #3 is that it introduces an entirely
different hand positioning during the release and opens
the attacker to an assortment of more distant counters.
This release is particularly appropriate for the female
defender.
Technique #4 (Photographs 10, 11 & 12): Defender steps forward with his right leg and simultaneously drives his "live handed" right arm rearwards, down and away from the opponent. The movement ends with the arm being thrust to the rear, with the palm of the defender's right "live hand" facing his abdominal wall in the process. A shorter person executing the technique against someone with greater weight or size advantage will find it helpful to position the right elbow inside of the attacker's left arm. Doing so will greatly increase the breakaway leverage of the technique. Also, Technique #4 can be executed equally effectively with the defender stepping backward with his left leg (perhaps into a horse stance, depending on your preference), as opposed to forward with the right. Try both methods to see which you prefer. Click below to support this vessel with a donation, or its into Davey Jones locker we go!!!
Conclusion
These techniques were taught to me during my first formal Hap Ki Do class. With many instructors, the practice of making them part of the first day's instruction remains. If one were to think of the martial arts as a living language, these breakout techniques would represent the first attempts at vocalization by an infant. Hidden in their simplicity are some of the most profound lessons to be garnished from any martial arts drill. Take them and work them. Try them with both hands, with stances, without stances, moving forward or backward, against attackers of different size, blindfolded and against two-handed grabs. With a little practice, you'll be able to free yourself instantly from any grip, and in the process, will have added important new dimensions to your martial arts experience. |


[Home] [About Us
] [Archie] [Concepts] [Contact Us]
[Gun
Fu Manual] [Kata]
[Philosophy] [Sticks] [Stories] [Web
Store] [Terms of Use]
[Video]
Copyright 2000-2025, Mc Cabe and Associates, Tacoma, WA. All rights reserved. No part of this site can be used, published, copied or sold for any purpose, except as per Terms of Use .